Here is our quick guide on how you can create a user's account, without the user being manually invited. This can be effective if you'd like to have all users on the learning portal at once, for the release of a training course or phishing simulation.
Firstly, you will need to select 'Add users' within the Users and groups section of the learning portal, and add the name of the user you'd like to add.
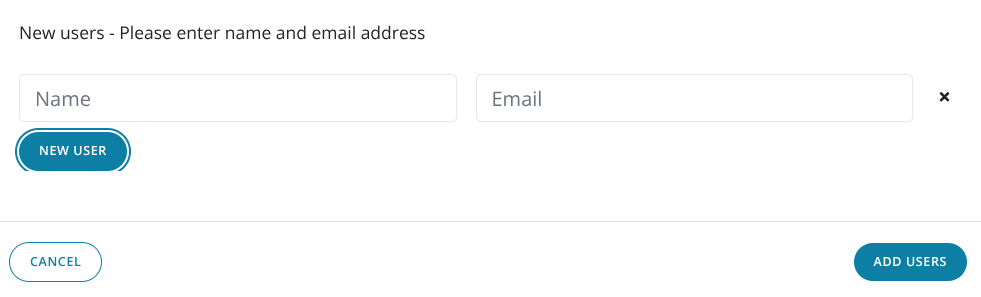
For the Email address however, you will need to use an email you have access to such as a support or information Email Address, as this is where the invitation will be sent. You will then need to set the email address as a one off address, using the first name of the new user you are trying to add, for example, Support+user@bobsbusiness.co.uk.
After this, click Add users, and send the invite!
Note - Be sure to logout of your own account after sending the invite, otherwise you may automatically log back into this account when using the invitation.
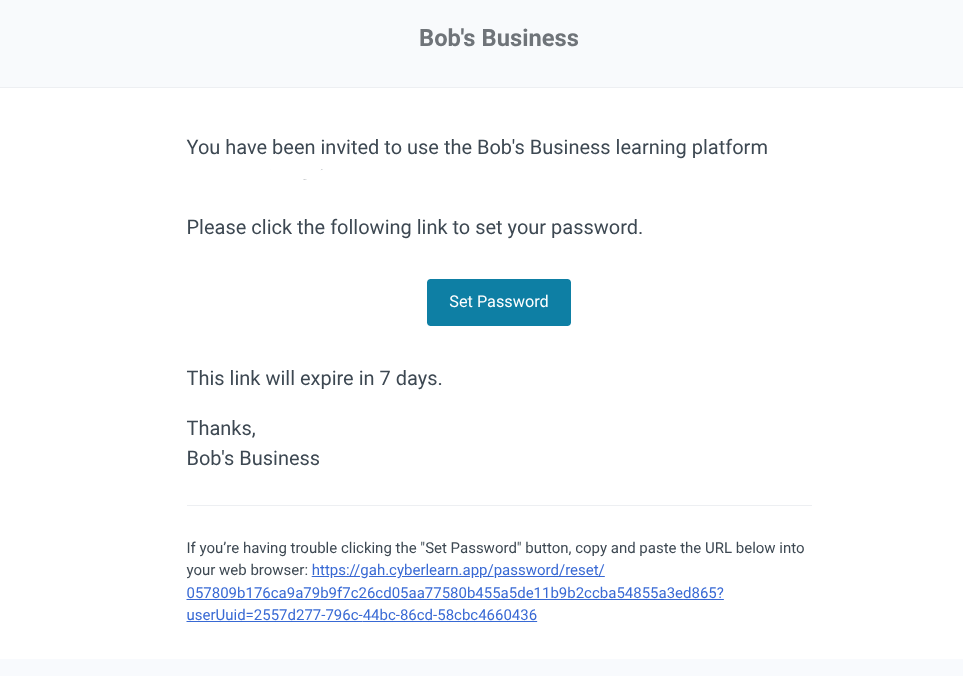
After receiving the above invite, click set password, and choose a memorable password for this user's account. This won't matter too much, as you may invite this user later on, where they are then given the option to choose their own.
Once you've done this, log out of the new user's account and back into your own admin account. We are now going to change the Email address from the generic address, to the users work Email.
After logging into your own account, locate the Users and Groups page again, search for the newly added user, and click on them to access their User Information.
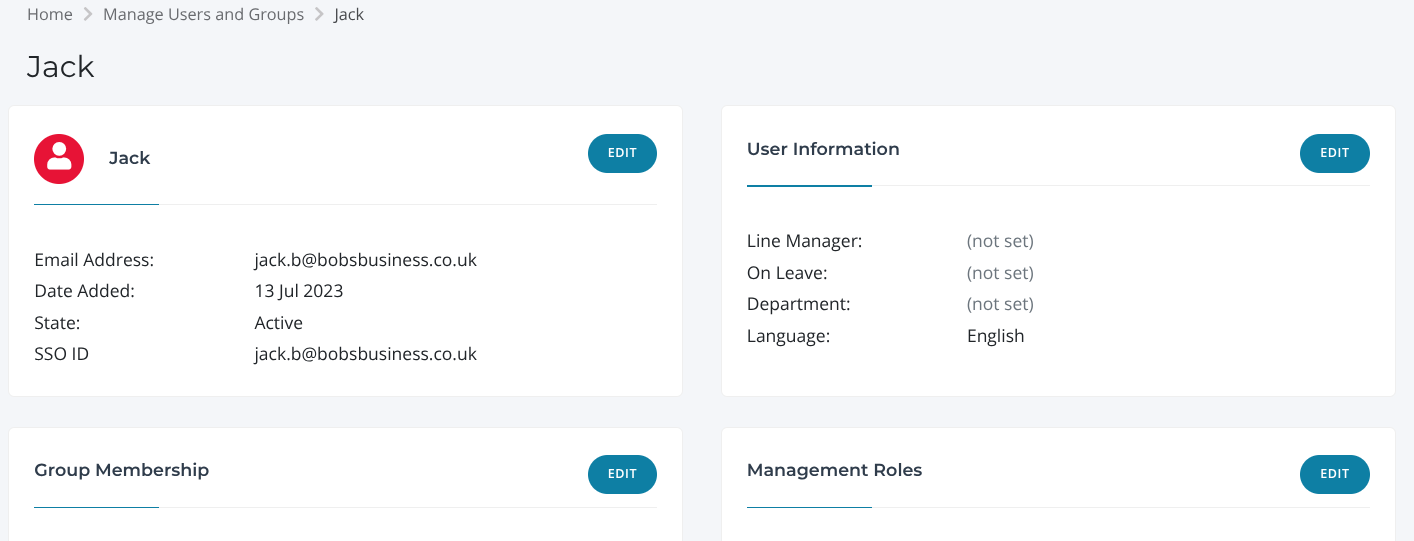
After you are met with this page, you will want to edit the top left box containing the Email Address, and set it to the work Email and save. While here, you can also select the checkbox for User notifications and turn this off to ensure no unnecessary communications are received!
Once you have done this, you have successfully and silently added and created a new account for a new user!