This guide will show you the necessary steps to having smart groups, and instilling a manager into your smart groups.
The first step is to make sure you have user information fields set up under the ''organisations'' taskbar, and then selecting ''user information fields''.
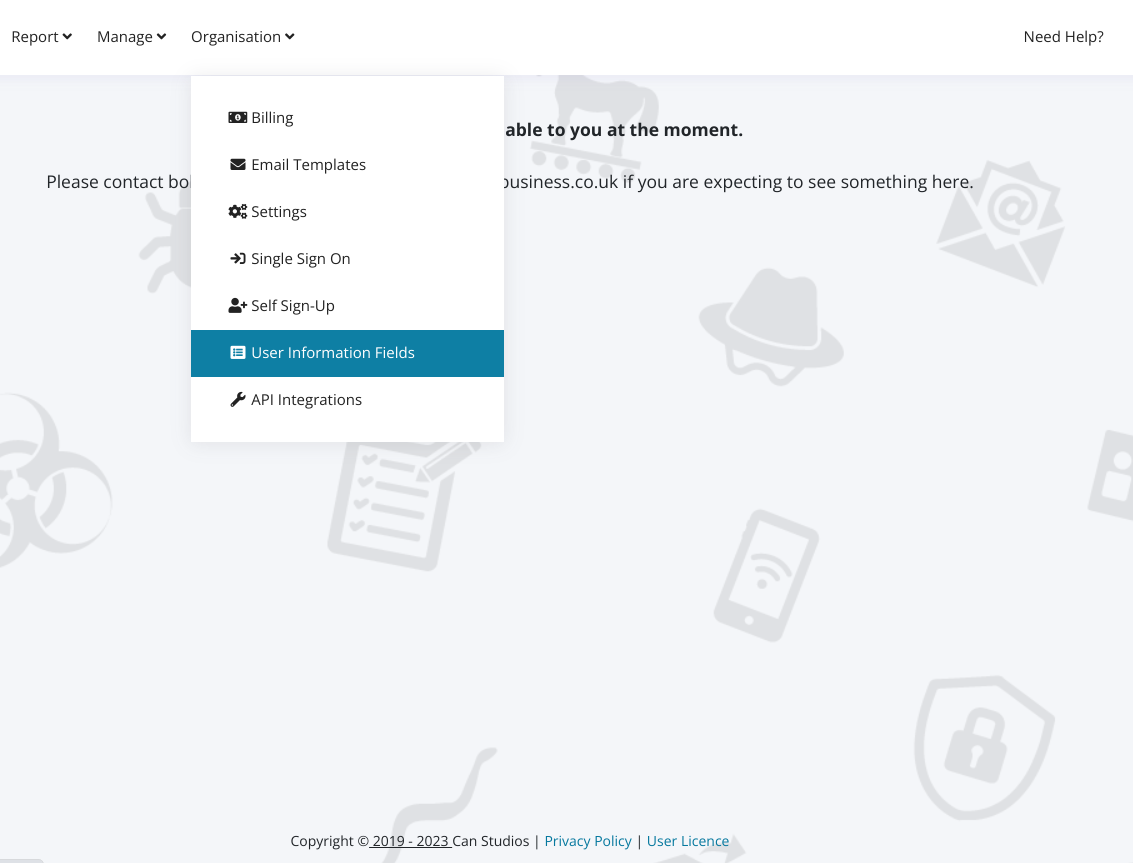
Once you are onto the user information field page, you then need to click ''add'' on the right of the screen, and choose selection rather than text entry. By choosing selection, you are able to add options, which will become apparent as we set up the Line manager groups.
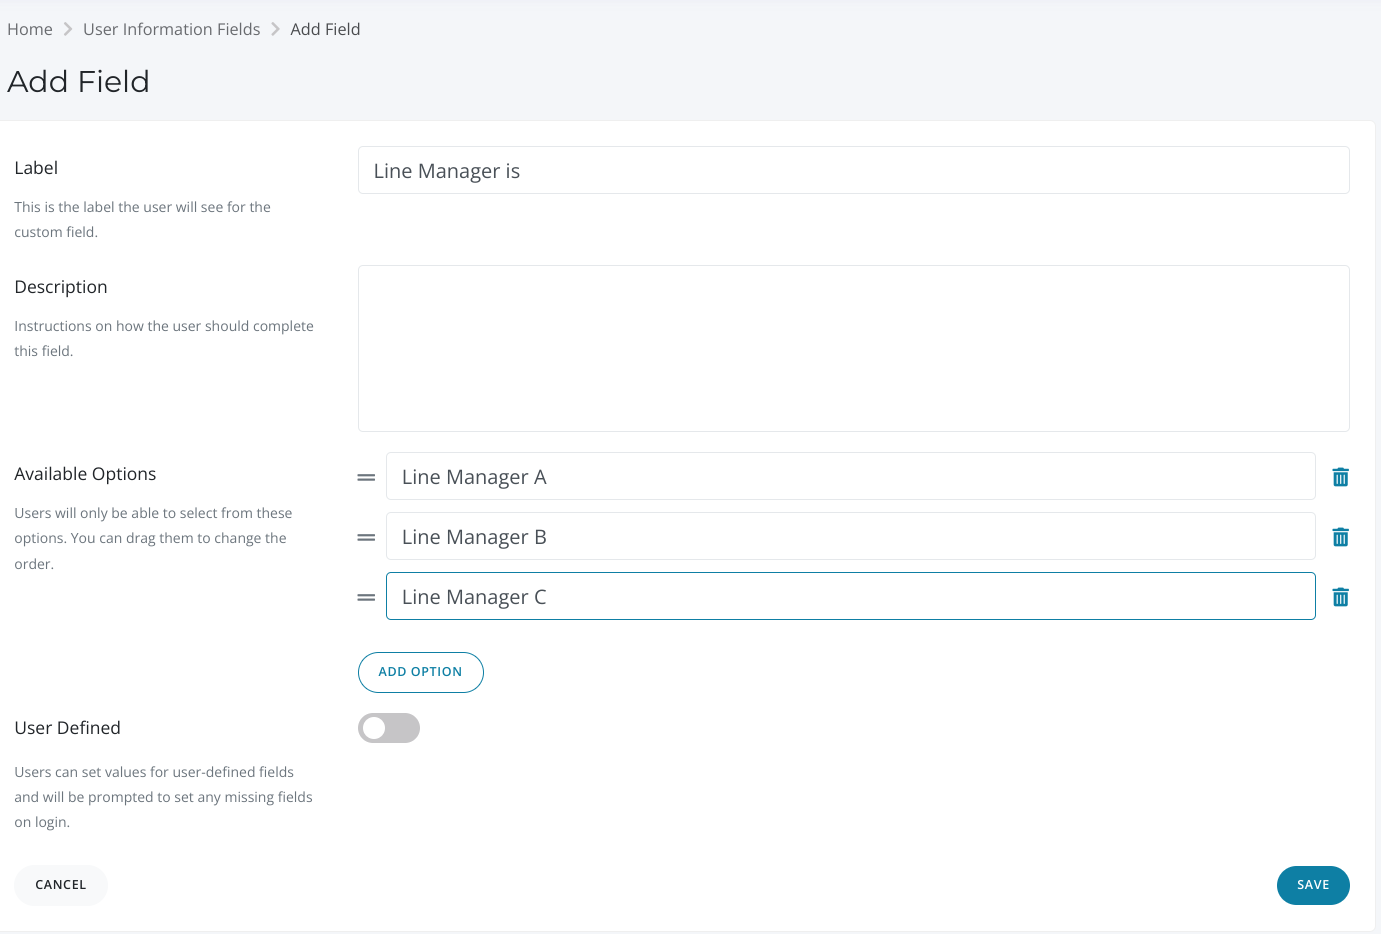
All you need to do is make these options, and label the options under the names of the line managers. However, beware, as you can only have a maximum of 20 options. If you have more than 20 options, then choose ''text entry'' instead of selection.
Afterwards, tick the little checkbox underneath the ''add option'' button. This allows all users to fill in their own line manager when they next log in, and will auto-assign them to the smart groups once created, as long as the line manager they enter is one of the options set up by yourself above.
Once done, hit ''save'' on the bottom right.
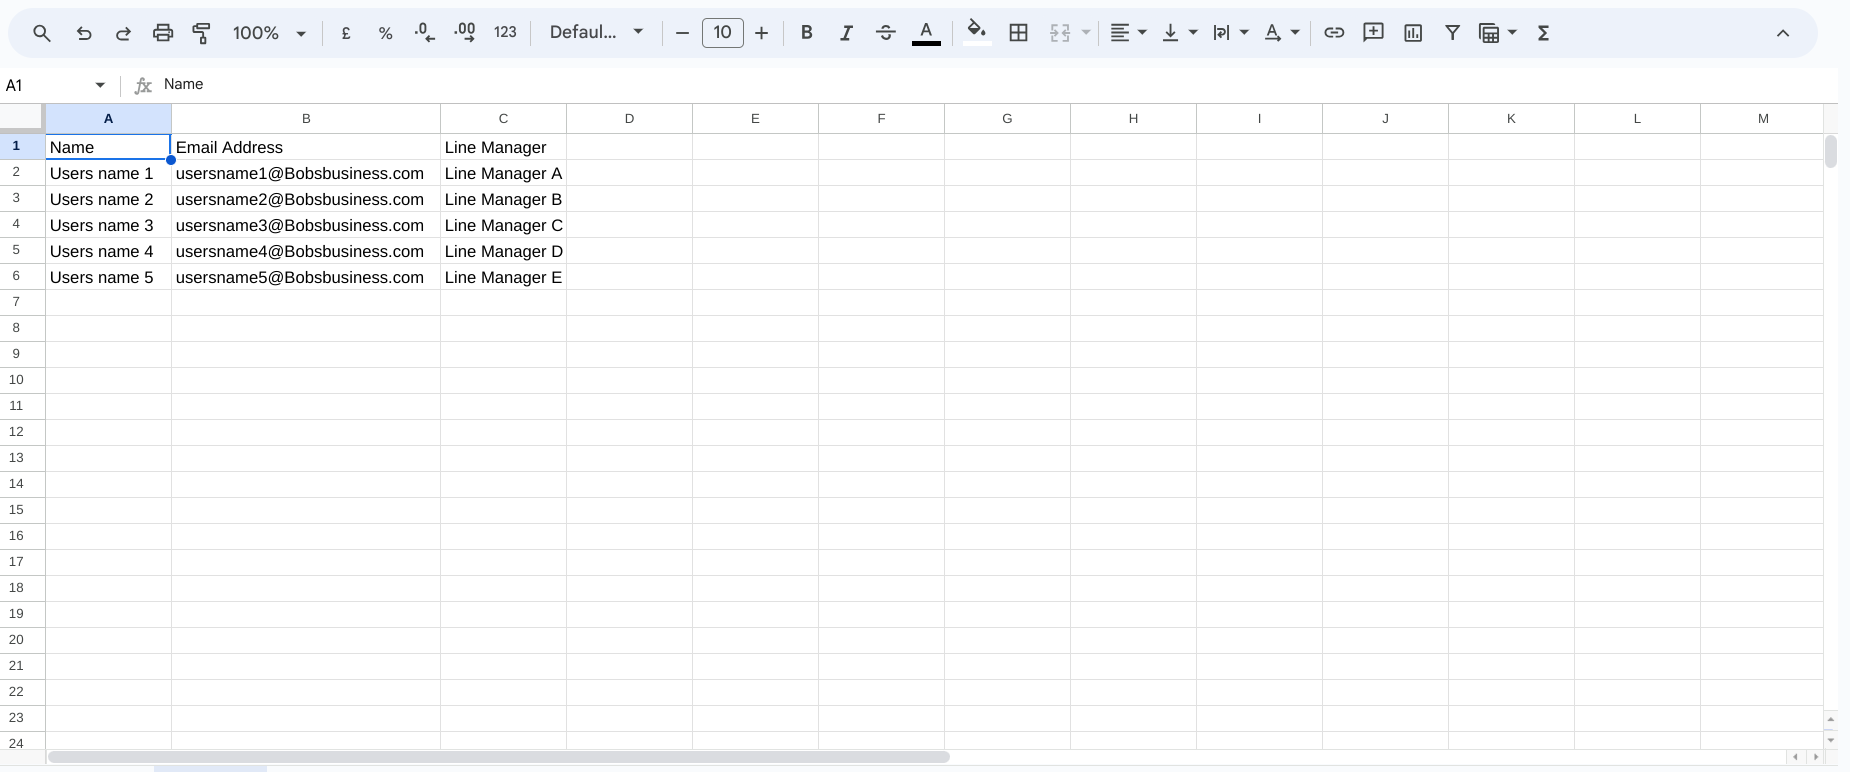
The final step before creating the smart groups is to import a user list from a spreadsheet which includes a column for your users name, their email address, and finally a column for line manager.
Here is an example of how it should look:
.webp)
After you have downloaded the spreadsheet as a csv. file, you can import it to your portal by going to ''manage'' >> ''users and groups'', and clicking the ''import users'' button, which can be found next to the 'add users'' button on the right.
Next up is the creation of the smart groups them self. To do this, go back to the home screen on your portal and go to ''manage'' >> ''users and groups''.
Once there, you''ll find a little box named ''groups''. This is where you can view and select all your groups you have on the portal. In that same groups box, there will be a green button called ''new'', go ahead and click it, and then select ''smart group''.
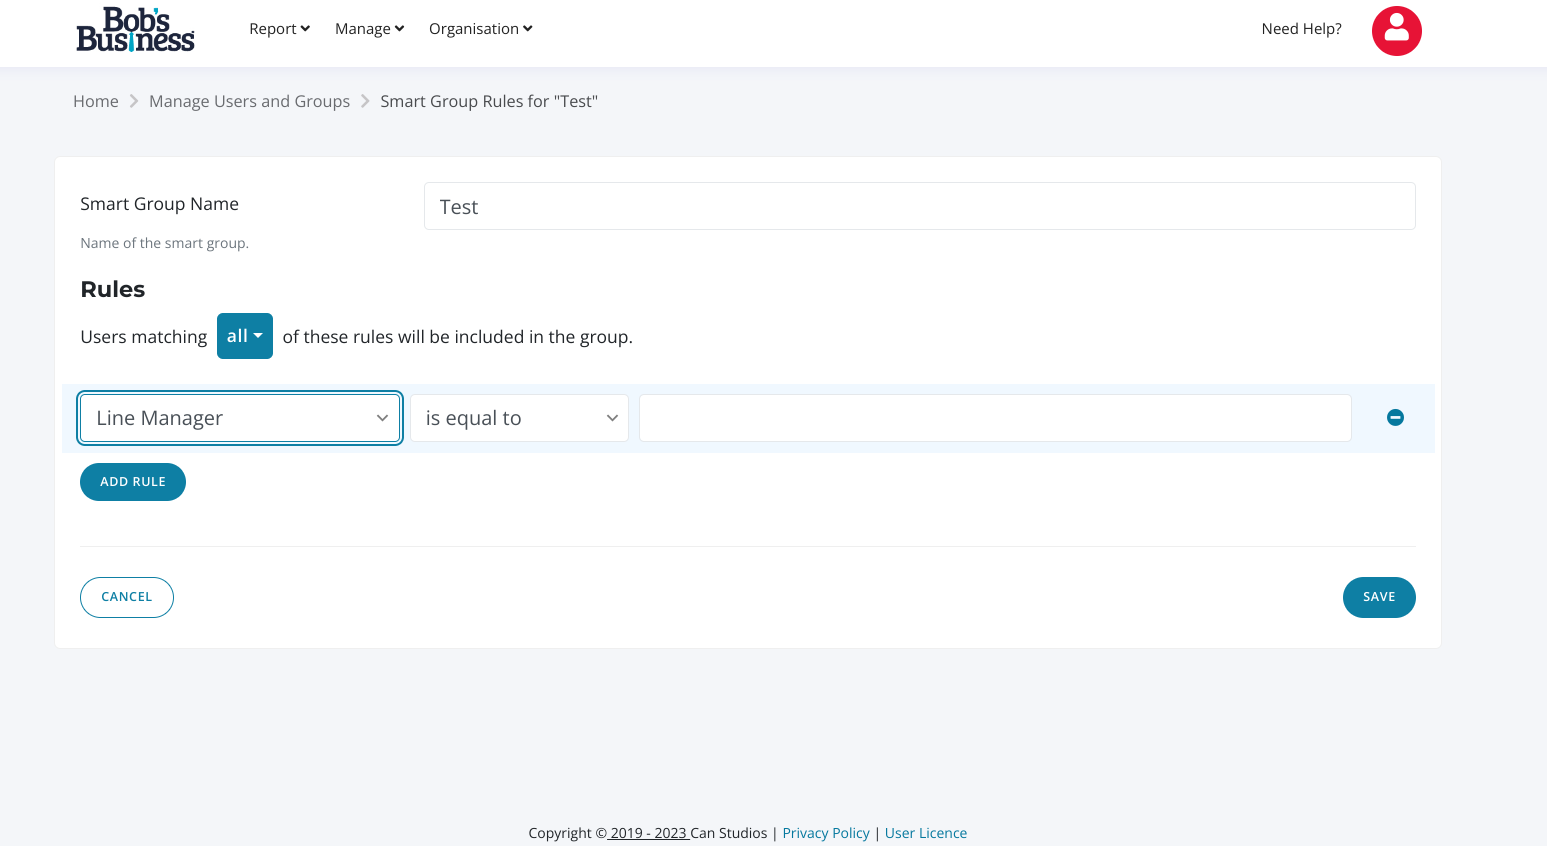
You will then be given the opportunity to name the group for your line managers, go ahead and name it what you like!
Next up, you will come to a page with the option of adding rules to the smart group, which helps determine who will be imported into the group. This is where we use the information field set up earlier for line managers. Do this by selecting the rule ''line manager'' >> ''is equal to'', and then inputting the name of one of your line managers in the next box and click save.
.webp)
This will have your smart group all set up! After a short moment, there will be a pop up in the smart group saying ''synchronising''. This is our system adding in the appropriate users based off of the line manager rule.
Finally, to add your manager to the smart group itself and to have them set up to receive reports, you have to return back to the users and groups page, and select your smart group now set up. Then you must go to ''management'', and there will be a button called ''add manager'' to click.
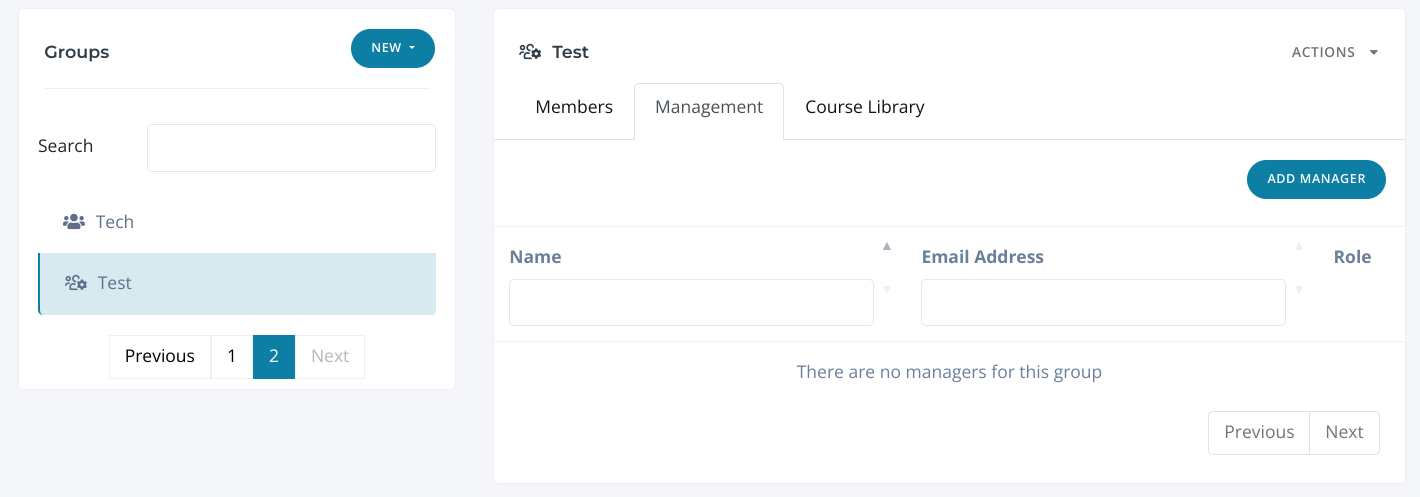
Lastly, add the manager to the needed group, and keep the user role as 'reporter' so that they receive a weekly report of the assignments that a particular smart group is set up to do.
You are now all set up to go!