This article will show you how to enable SCIM in your current SSO setup. SCIM is used to auto-provision users via your active directory.
Microsoft Azure AD/Entra SCIM Setup
Please note! Before starting this process if you already have users on your learning platform duplicate accounts will be added if all existing users do not follow the same format of email address you are passing across.
By default, the attributes in the steps below will pass across the User Principle Name from Azure as the email address.
We therefore recommend checking everyone's current accounts on the platform match up with users principle names on Microsoft Azure.
If you need any assistance, please contact support@bobsbusiness.co.uk.
-
Please follow and utilise our guidance on setting up Single-sign-on (SSO) for Microsoft Azure AD/Entra in order to create your initial ‘Enterprise Application’. If you already have this in place you do not need to do this again.
-
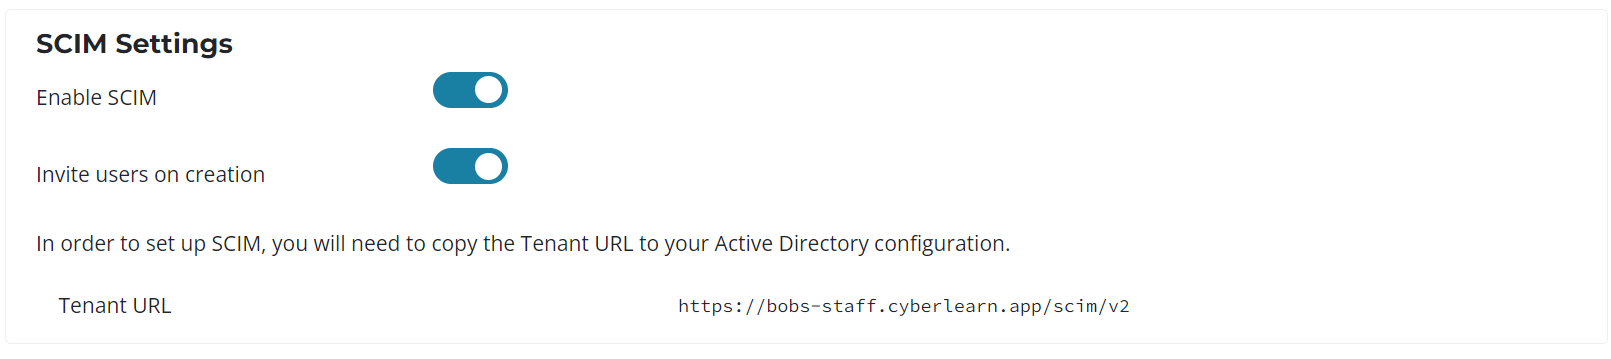
Once you have setup SSO successfully, enable SCIM from within your organisation under the ‘Single Sign On’ page. You can either choose to invite users on creation or invite them manually after you’ve provisioned them via SCIM. Note down the ‘Tenant URL’ here.
-
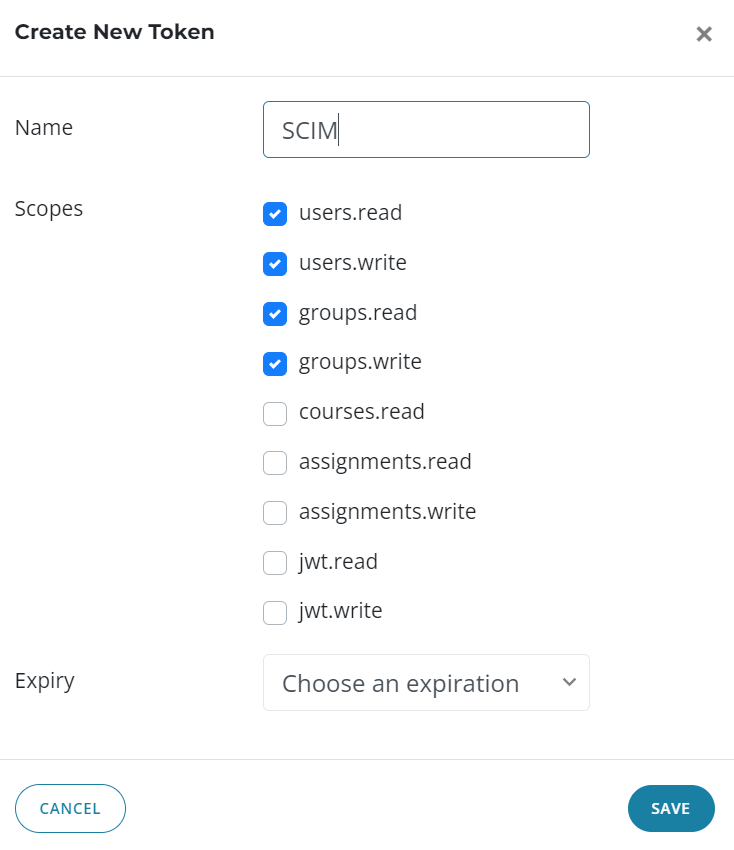
Next you will need to create an API token for SCIM by going to ‘Organisation’ -> ‘API Integrations’ -> ‘Create New Token’
-
Give the token the following permissions:
-
Save the API key for the following step.
-
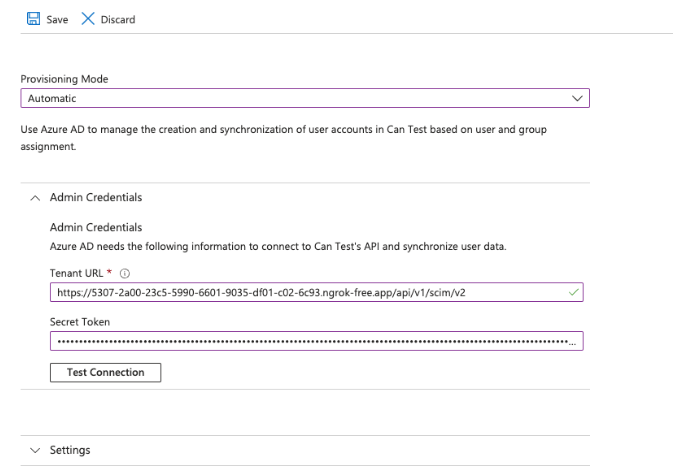
Go to the Enterprise Application you set up for Bob’s Business - in the left hand menu, select ‘Provisioning’, set ‘Provisioning mode’ to ‘Automatic’ and fill it out with the Tenant URL and API key you generated. Then test the connection.
-
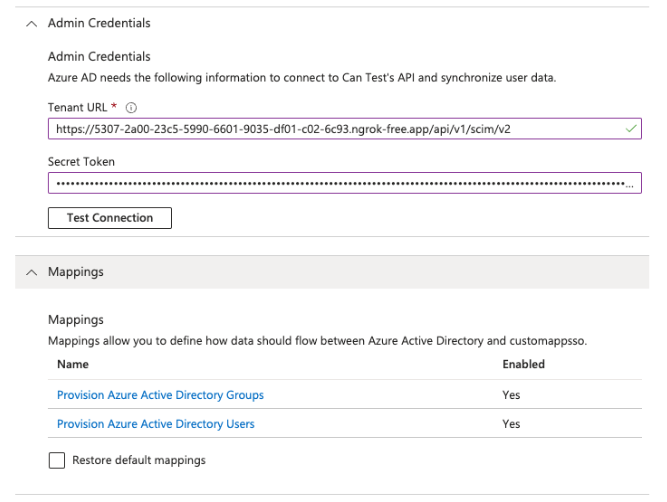
After the connection has been tested and saved, a new dropdown should appear on the page for 'Mappings'. Expand this to see links to provision Active Directory for Users and for Groups.
-
Setup the mappings for the users as follows:
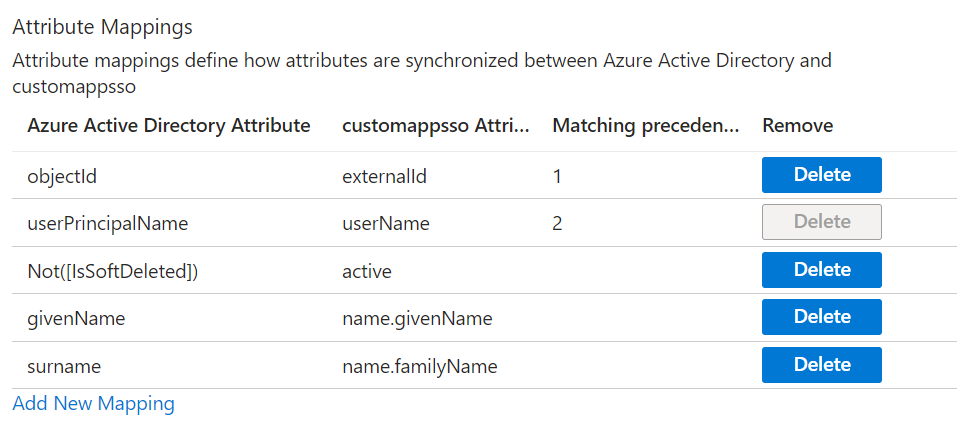
Please ensure the attributes are the same as above, these are the only attributes that can currently be passed over to the platform.
The only exception would be if you need to pass the "user.mail" attribute instead of "User Principal Name" but please ensure this reflects the current data on your platform and your Single Sign On configuration (defaults to user.mail) before doing this.
-
Setup the mappings for groups:
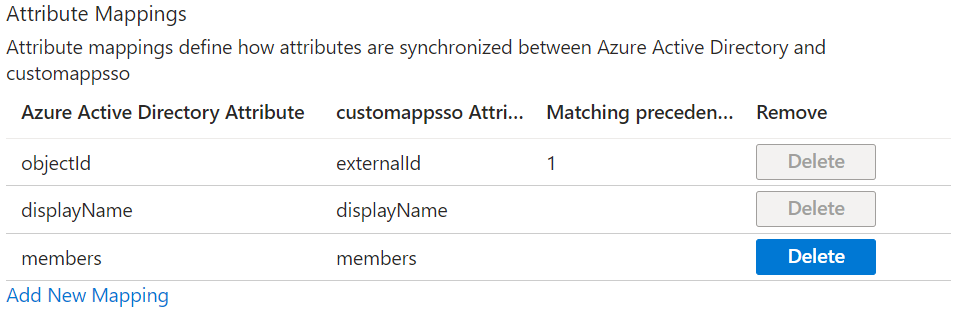
Again, Please make sure to add the same attributes as shown in the screenshot above.
-
Assign your users to the application.
-
Click 'Start provisioning' to start automatic provisioning. This will send data to your organisation roughly every 40 minutes. The first sync usually happens within 5 minutes but can take longer. From this page, you should be able to see the status of the latest sync along with a count of the number of users and groups that have been synced. You can stop and start automatic provisioning at any time.
-
If you wish to test syncing outside of the automatic cycle, you can click on 'Provision on demand'. This allows you to manually select some users and groups and sync them immediately. (Note: if you are syncing a group on demand, you must manually select any members you want to sync at the same time - there is a limit of 5 members per on-demand sync). When you provision on demand you should see output from the sync almost immediately.