This article will show you how to enable SCIM in your current SSO setup. SCIM is used to auto-provision users via your active directory.
-
In order to utilise SCIM with Okta, you first need to setup SAML SSO - please follow our SSO guidance on this before attempting to setup SCIM provisioning. If you already have this in place you do not need to do this again.
-
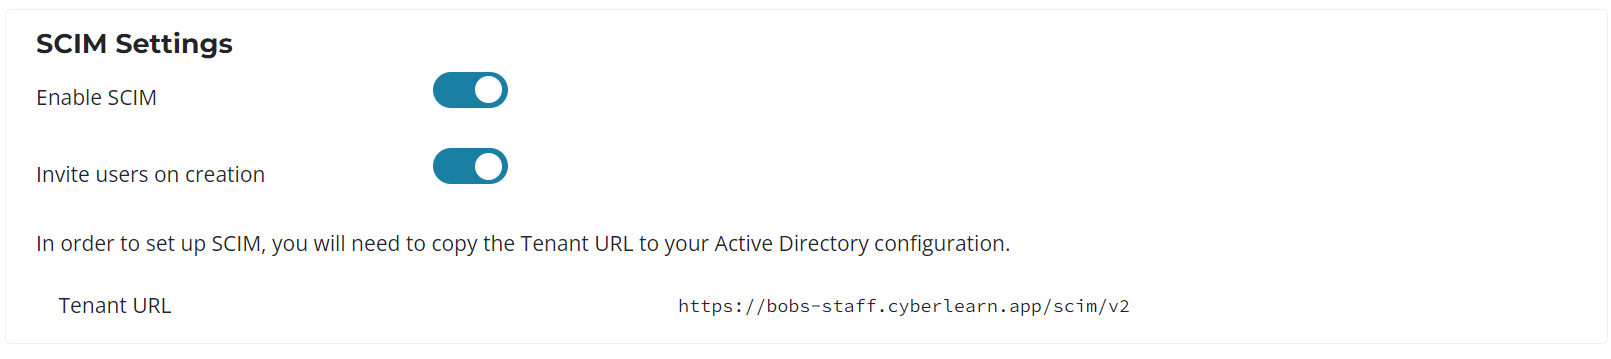
On your portal enable SCIM provisioning under Organisation > Single Sign On, save the Tenant URL for later - You can either invite users on creation or choose to manually send the invites after they’re provisioned.
.webp)
-
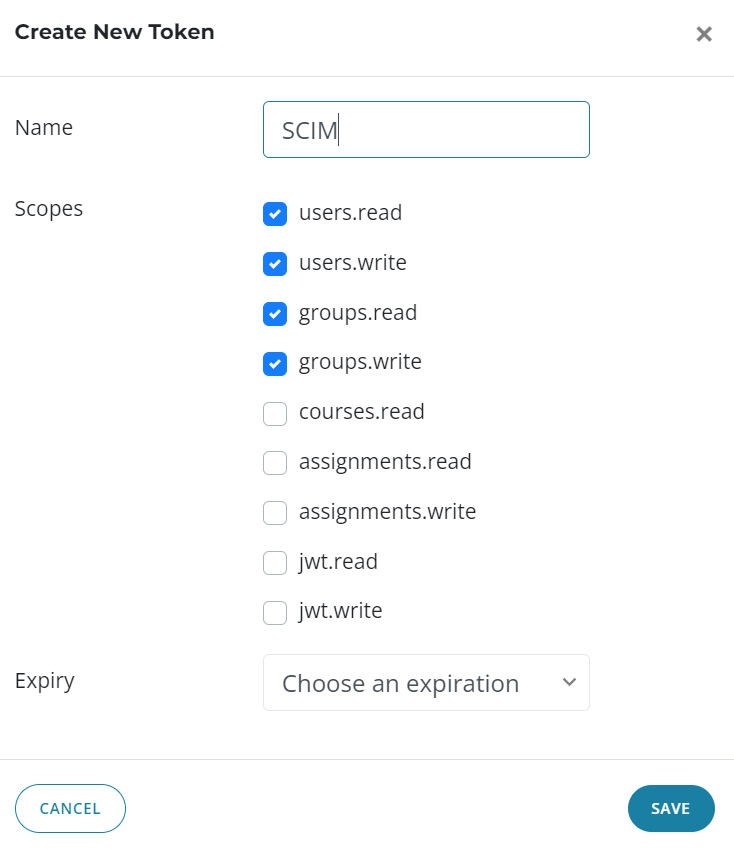
On your LMS portal click on Organisation > API Integrations and create a token with the permissions: users.read, users.write, groups.read and groups.write
.webp)
-
Save the token string
-
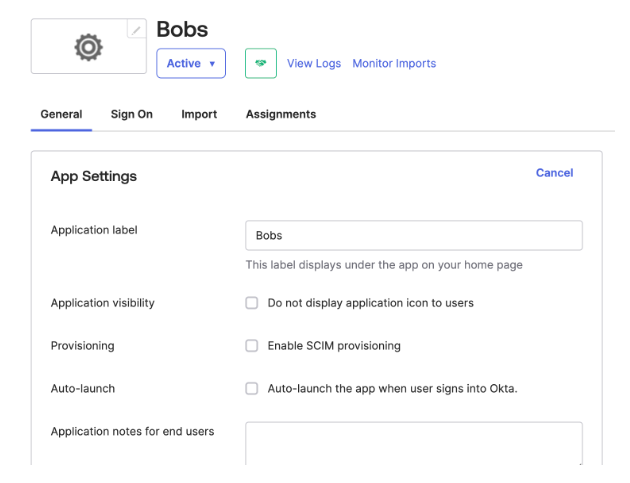
On your app in Okta, enable SCIM Provisioning under General > App Settings and save the changes
-
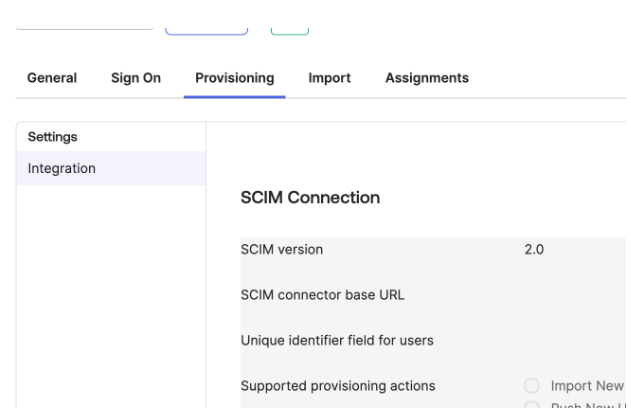
Open the new Provisioning tab
-
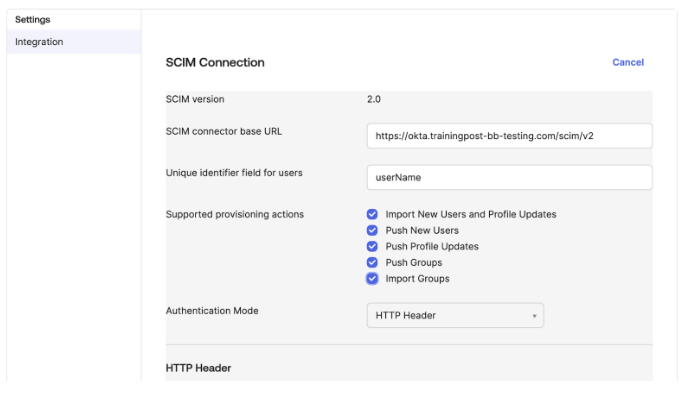
Enter the details below:
-
Your SCIM connector is your Tenant URL from the LMS (your URL + scim/v2)
-
UID for users is userName
-
Tick all boxes for actions
-
Authentication mode is HTTP Header
-
-
Fill your HTTP token using the API key generated from the LMS and click test configuration

-
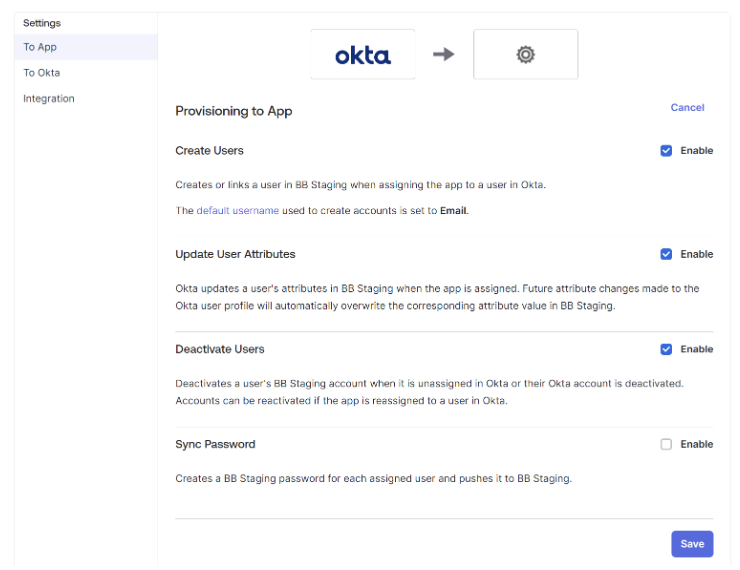
Once completed, ensure the following options are enabled in the settings:
-
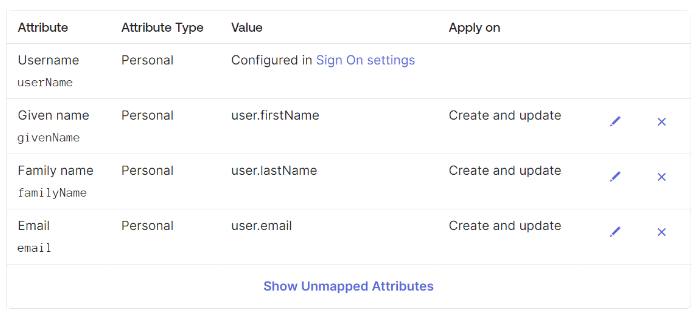
Then ensure attribute mapping is configured as follows:
-
The integration can then be used by visiting the ‘Assignments’ tab and assigning users and groups.
-
In order to sync groups, you must use the ‘Push Groups’ tab on the custom app integration. If you do not see this option and pushing groups is unavailable to you - you may need to speak with Okta to get this enabled for your tenant.
If you need any support please email support@bobsbusiness.co.uk and we can assist.